In this short tutorial, we will guide you through setting up the system environment for running the MUNIT, which stands for multimodal unsupervised image-to-image translation, software and then show several usage examples.
Most of the existing unsupervised/unpaired image-to-image translation algorithms assume a unimodal mapping function between two image domains. That is for a given input image in domain A, the model can only map it to one corresponding image in domain B. This is undesired since in many cases the mapping function should be multimodal or many-to-many. For example, for an input summer image, a summer-to-winter translation model should be able to synthesize various winter images that would correspond to the input summer image. These images could differ in amount of snow accumulation but they all represent valid translations of the input image. In the most idea case, given an input image, an image translation model should be able to map the input image to a distribution of output image. This is precisely the goal of MUNIT.
MUNIT is based on the partially-shared latent space assumption as illustrated in (a) of the above image. Basically, it assumes that latent representation of an image can be decomposed into two parts where one represents content of the image that is shared across domains, while the other represents style of the image that is not-shared across domains. To realize this assumption, MUNIT uses 3 networks for each domain, which are
- content encoder (for extracting a domain-shared latent code, content code)
- style encoder (for extracting a domain-specific latent code, style code)
- decoder (for generating an image using a content code and a style code)
In the test time as illustrated in (b) of the above image, when we want to translate an input image in the 1st domain (source domain) to a corresponding image in the 2nd domain (target domain). MUNIT first uses the content encoder in the source domain to extract a content codes, combines it with a randomly sampled style code from the target domain, and feed them to the decoder in the target domain to generate the translation. By sampling different style codes, MUNIT generates different translations. Since the style space is a continuous space, MUNIT essentially maps an input image in the source domain to a distribution of images in the target domain.
- Hardware: PC with NVIDIA Titan GPU. For large resolution images, you need NVIDIA Tesla P100 or V100 GPUs, which have 16GB+ GPU memory.
- Software: Ubuntu 16.04, CUDA 9.1, Anaconda3, pytorch 0.4.1
- System package
sudo apt-get install -y axel imagemagick(Only used for demo)
- Python package
conda install pytorch=0.4.1 torchvision cuda91 -y -c pytorchconda install -y -c anaconda pipconda install -y -c anaconda pyyamlpip install tensorboard tensorboardX
We also provide a Dockerfile for building an environment for running the MUNIT code.
- Install docker-ce. Follow the instruction in the Docker page
- Install nvidia-docker. Follow the instruction in the NVIDIA-DOCKER README page.
- Build the docker image
docker build -t your-docker-image:v1.0 . - Run an interactive session
docker run -v YOUR_PATH:YOUR_PATH --runtime=nvidia -i -t your-docker-image:v1.0 /bin/bash cd YOUR_PATH- Follow the rest of the tutorial.
We provide several training scripts as usage examples. They are located under scripts folder.
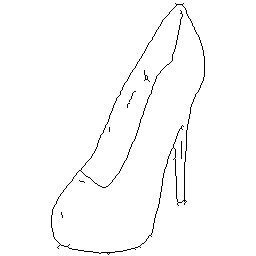
bash scripts/demo_train_edges2handbags.shto train a model for multimodal sketches of handbags to images of handbags translation.bash scripts/demo_train_edges2shoes.shto train a model for multimodal sketches of shoes to images of shoes translation.bash scripts/demo_train_summer2winter_yosemite256.shto train a model for multimodal Yosemite summer 256x256 images to Yosemite winter 256x256 image translation.
If you break down the command lines in the scripts, you will find that to train a multimodal unsupervised image-to-image translation model you have to do
-
Download the dataset you want to use.
-
Setup the yaml file. Check out
configs/demo_edges2handbags_folder.yamlfor folder-based dataset organization. Change thedata_rootfield to the path of your downloaded dataset. For list-based dataset organization, check outconfigs/demo_edges2handbags_list.yaml -
Start training
python train.py --config configs/edges2handbags_folder.yaml -
Intermediate image outputs and model binary files are stored in
outputs/edges2handbags_folder
First, download our pretrained models for the edges2shoes task and put them in models folder.
| Dataset | Model Link |
|---|---|
| edges2shoes | model |
| edges2handbags | coming soon |
| summer2winter_yosemite256 | coming soon |
Run the following command to translate edges to shoes
python test.py --config configs/edges2shoes_folder.yaml --input inputs/edges2shoes_edge.jpg --output_folder results/edges2shoes --checkpoint models/edges2shoes.pt --a2b 1
The results are stored in results/edges2shoes folder. By default, it produces 10 random translation outputs.
| Input | Translation 1 | Translation 2 | Translation 3 | Translation 4 | Translation 5 |
|---|---|---|---|---|---|
 |
 |
 |
 |
 |
 |
The above command outputs diverse shoes from an edge input. In addition, it is possible to control the style of output using an example shoe image.
python test.py --config configs/edges2shoes_folder.yaml --input inputs/edges2shoes_edge.jpg --output_folder results --checkpoint models/edges2shoes.pt --a2b 1 --style inputs/edges2shoes_shoe.jpg
| Input Photo | Style Photo | Output Photo |
|---|---|---|
 |
 |
 |
Coming soon.


